

Are you a Web designer? And feeling stressed while designing a website in order to get the best outcome with unique styles and designs? Then this article is for you. For giving the best to your clients you go through so much research and searches in the backend before laying hand on the website to design, you always try and use many plugins, extensions, themes tools, etc; for building trust in the public. In the process, you want to know details of the pages of a specific website for inspiration, but it is not that easy. Maybe there are many plugins or extensions for fulfilling this need but as designers, we can’t trust them all for some reason.
What if I say there is one of the best Chrome extensions which fulfills each and every micro need while designing, it gives details of the pages of a specific website’s backend to boost your peaceful web designing productivity! YES! IT’S ABSOLUTELY TRUE…..while moving into the article, you will know what are those details you get about the website.
What is HOVERIFY Chrome Extension?
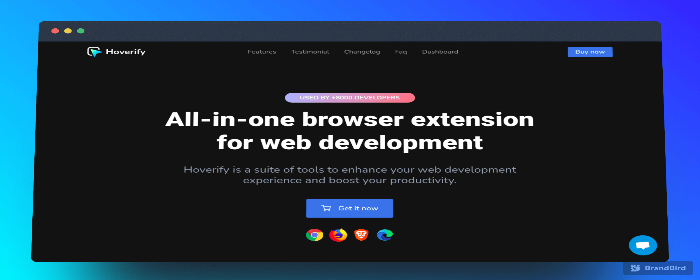
Hoverify extension is an extension for chrome based browsers. It brings a bunch of tools useful for website developers in one package. It is a browser extension used to inspect, edit, and copy HTML and CSS with a click. The software offers a selected mode to design animations and media queries. Hide or remove elements from the page. Take screenshots of all the tabs in minutes.
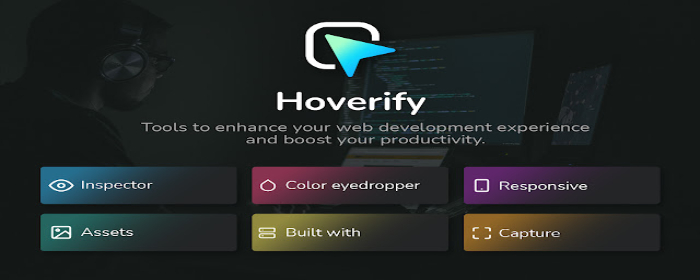
Before we move, we actually take a proper in-depth look at how everything works. If you jump on the Hoverify website and scroll through, basically, it shows 7 different Options
- Inspector
- Eyedropper
- Built With
- Responsive
- Assets
- Screenshots(Capture)
- Debug
How to use Hoverify Chrome Extension?
Take a look at these wonderful cool and user-friendly features of options in a moment
First INSTALL AND ACTIVATE Hoverify on your computer
Now you get a new entry on your browser at the top right corner, when you click it opens and we see all those 7 different options
Before diving into these options first look at 2 icons
SETTINGS ICON – This allows you for enabling and disabling features according to your need,
OTHER ICON – This icon gives the list of keyboard shortcuts
Now let’s check Hoverify and click on options…..I’ll explain to you clearly how each and every feature of these options works.
INSPECT OPTION
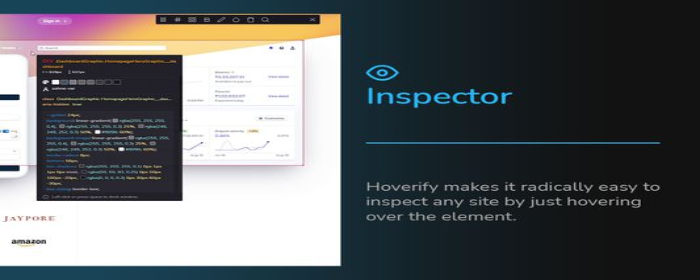
This will help you to give a sub-section of tons of extra tools. If you look a lot in here there is an awful lot going on. Following are sub-sections of INSPECT OPTION:
- GUIDELINES
- GRID
- CSS BOX
So you get this ability to check Guidelines, you can take look at Grids, CSS box, and so on.
GUIDELINES: After clicking on this sub-section and hovering on your window you get the style of a pop-up box and it highlights what exactly HTML you are targeting…for example….H1, H2 OR H3; if you take the actual panel itself and click on the spacebar and lock it, you will see that it gives you the information about selector, size, colors, what typography has been used and any classes associated with it, it gives us all CSS based information to do with that specific select or, it gives us box sized colors, etc, it also gives medium query information it is pretty much cool,
If you want to change it, you have to go to class in searcher, you have multiple options for example woo commerce sites, and in each kind of button and element, they may contain lots of classes associated with. This will list all the classes at the top, if you want to change, change the view just you can see everything is dumped into one box on the right side of the pop-up box. You can use this…..in that you will see all options ….Before After, GB container, Genric blocks
And now about Square shaped collection box, if you click on that it will copy, all the details which are in a pop-up box on the clipboard and you can paste it wherever you want and use it however you want.
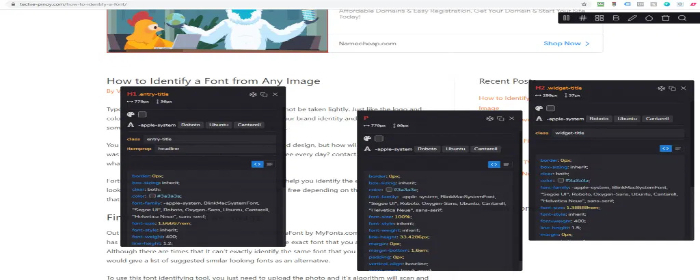
Now you can also see TYPOGRAPHY ICON for font discovery if you click on that, it takes you to the google fonts will show exactly which font is being used throughout the page.

And you can see three icons on the top right.
First, one is used to grab all and take you over to code pan which helps you to power play and without copying and pasting you can use it.
And second one is for copying on the clipboard and pasting it and using it as you want and
The third one is to close pop up box after finishing work, you can also use the keyboard ESC button
You will also notice other options
GRID….if you select this, it will put a bounding box on every single item on your particular page, and everything gets highlighted, you can still use the option to hover and see what’s been used, where been used, you can disable this by simply clicking on GRID icon a second time
CSS BOX which visualizes margins and paddings, if you hover over anything on the page it will show any padding, any margins, and still brings up this pop-up box that allows you to see exactly everything where and what has been used.
For seeing details of more than one element at a time, you can click on the space bar to lock the pop-up box to not move, move on to another element, and click on the space bar to lock it. Look because you have chosen an image this time you notice more information about this element you see….you can find Source, lazyload, classes, height and width, and sizes, and underneath you get CSS information associated with, to break things, changes the options, you see any Kseudo class is being used….press ESC or cut icon come back.

Now open Hoverify and again click on INSPECT – here you also get FONTS….
this allows you to show which typography is been used on this entire page, where has been used, and so on
EDIT….with this you can directly interrupt the page and make changes adding text, etc;
COLOR PALLET….which allows you to analyze the entire page and look for the image’s colors; photograph anything like that it will create a color pallet of…shades, RGB values, etc; of the colors used on the entire page. You can simply copy this and use it.
And now the Trash option …..If you click on this and enable it, if don’t want to show anything on the page, click on HIDE, it’ll be hidden, you can also undo that by Refreshing the page inside Hoverify. And if you click on the remove option you can remove it with one click on that element. You can go and test and know how things interact and work pretty cool.
SEARCH option……..which allows you to search through the entire page for any element’s tags, IDs, or classes and how they have been used, and so on.
CUSTOM CSS option……which allows you to directly interact by opening with your own custom CSS.
CUSTOM JAVASCRIPT
You also look at custom Javascript, and you can interact with the entire design live inside the browser window using these sets of options inside the INSPECT PANEL.
COLOR EYEDROPPER OPTION
As its name suggests it allows you to grab the color on the page, you can copy, save and use where ever you want, arrange them as you want.
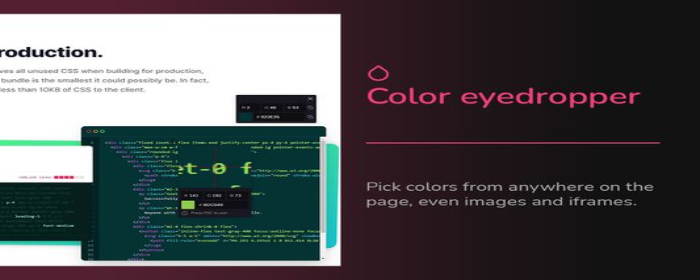
If you choose pick a color option and come over any of these elements hover it shows its RGB and details of the color and when you click on the spacebar to lock the pop-up box and you can come to another element by clicking on pick color by hovering….CLICK ON ELEMENT we get information on that particular element and by clicking on copy icon, you can save the colors RGB, and hexodes. And by clicking on the spacebar and hovering on other elements helps us to see details of more than one element at a time.
And when you open Eyedropper ……selected colors will be shown in that box, you can save it or copy, and paste as you want…..super quick and easy
ASSETS OPTION
If you open ASSETS PANEL, it will give you a range of different panels where we can see different images, and assets that have been used on any given page…..you can see
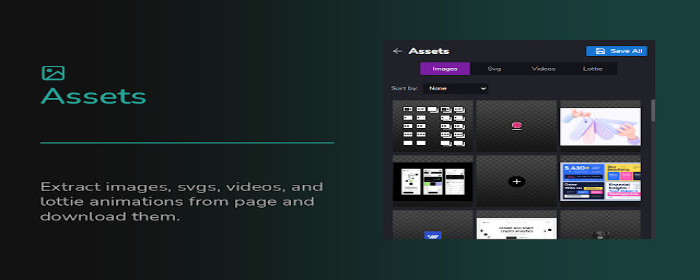
IMAGES…and sort by name and size
SVG….you can see SVG images
Video….you can see videos that are embedded.
Lottie……you can see Lottie images if used.
Coming to the IMAGES option ….if you hover over any image, you get the option to copy, Download, and SAVE ALL just to grab everything download as one zip file and then you can use it. It is JUST great if you just go read and assign a client’s site a quick and easy way to grab all the assets of that page, you can do that directly inside this tool. Obviously, do make sure if you use something like this, you have a legal copyright to be able to access any of these images.
RESPONSIVE OPTION
AND next on the list is one of the most useful and important options inside Hoverify when you are building a website is the Responsive option.

RESPONSIVE OPTION – this will open a new tab and shows the range of different devices, mobile devices. Let’s think you create something unique by yourself, this shows you what even looks like on a different range of devices. It gives the information of device name, and resolution being used….if scroll down you can see different devices tablets, mobiles, and so on.
The nice thing about this is, if you interact with any one of these devices, it will show how it looks across all the devices. If you interact with galaxy mobile and scroll down…….all other mobile responsive modes also get scrolled accordingly…you can see the difference, scroll space, any kind of widget problem on different devices, and any changes needed…..we get visual representation on all devices at a time.
And even can interact with the elements in any of these devices, if you click on the menu of the website….it will get open up and you can open every event, page, etc scroll down, and check responsive mode.
And now when you come on to the right top of the screen of that box there is an option to remove frames of devices leaving only with resolutions and the size of the screen itself or you can put the frames back on
OPTION OF Portrait and Landscape
OPTION OF PLUS ICON….if you click on it you can add your own device’s name, width and height, and user age who’s going to be used. you can save those in our custom options.
And finally, we got the option, and with that you can go ahead and manage and reorder devices. If you got things inside that you don’t care about, you can just delete them or turn them off.
In that if you click on the eye icon, you can edit by clicking on the pencil icon, you can access device name resolutions, etc…it’s pretty cool it’s a bunch as part of this anyway.
DEBUG OPTION
Now have the DEBUG OPTION, so when you open this up this allows you to check various different values,
you can see clear cache, you can clear cache from here you can keep the limit on how far you want to clear the cache
You see META Tags………You can see all the META TAGS USED on this specific page, ROBOT.txt information, if you scroll down you’ll get all the information. copy what you want or copy all the information. If you have any problem and want to send it over to outsource work you can send this information.
You can see LINKS…….Here you can make sure you don’t have dead links on this particular page, you can delete those links if you find,
You can see HTML……..HTML Semmatic….it will show all the HTML SEMMATIC elements. if they are missing, for example in the header is not set HTML code. You can see that and go back and set it right.
Finally, you also have the SPELL CHECK OPTION……..if you are not using Grammarly, you can use this. And if you click on check …..it will show you a number of mistakes where they have been used, if you want to ignore you can if you feel it is correct….pretty cool.
YOU also got BUILT WITH……
If you open this you will see details of HOSTING, TECH, SSL, DNS

IN HOSTING…..it will show which hosting is used for that particular site
IN TECH……it will show you all the tools which have been used, sometimes it will not come up with the right info.
IN DNS….it will show the information of DNS.
And next SSL…. will show the information of SSL supplied to this part of the site.
CAPTURE OPTION
This allows you to do full page capture, all tabs capture, visual parts, and so on. So you can use the Hoverify chrome extension to grab the entire page and use that in videos.
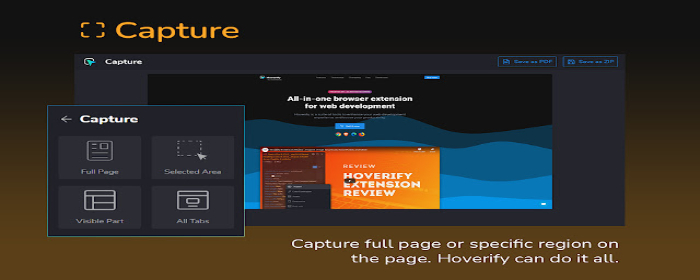
If you want to capture the full page…..CLICK ON FULL PAGE and it scrolls through the page for you and it will confine the images for you.
Then you can save it as PNG, JPEG, Pdf, or as a ZIP FILE.
And one most interesting things I do like about this is, if you want to give tutorials you may open multiple tabs at different parts of the screen at any given time. what you can do with this …CLICK ON ALL TABS. Go ahead and grab screens of all tabs….you can save them as a JPEG, PNG, ZIP file, or Pdf .you can capture all the screens at a time it is very easy and very quickly we can do it.
Best Suited For –
- SMBs and SMEs
- Online Businesses
- Programmers
- Freelancers
- Page Builders
- Entrepreneur
- Small Agencies
- Solopreneurs
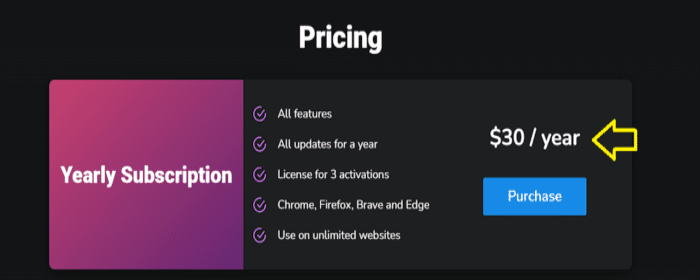
Let’s check Hoverify PRICING & Licence Key
And you see currently if you want to grab Hoverify, it costs 30$per year, and that gives you the ability to use it on 3 different browsers, if you pay remind that in your mind, if you use chrome installation, Edge, Firefox in your computer…..only that 3 licenses we can use.
ABOUT Hoverify APPSUMO Lifetime DEAL & Licence Key
Discovering on lifetime deal on APPSUMO. First of all, take a quick look at what’s included.
However, if you jump on to APPsumo, you can grab yourselves a lifetime deal of 49$ for the same plan basically with 3 active installs
If you talk about price and planning a 49$ lifetime deal …….it is used only for three extensions.
If you are a web designer you may have more than one chrome based user and many extensions like EDGE, FIREFOX, and devices.
There are free plugins and extensions you have for what you do inside Hoverify.
This not only helps you remove all the clutter from the various extensions added to the browser but also helps you lower the expenses from various paid extensions. Hoverify makes life a little bit easy because you get it all at one location, and very handy, and easy to use, within no time you can make your work done. Millions of Digital marketers are using Hoverify all over the world.
Hoverify Discounts

You often get discounts every year, especially on BLACK FRIDAY, and it depends on the market and the company’s decisions
HOVERIFY WITH IT’S GRABBING FEATURE GRABBED THE MARKET OF WEB-Designing TOOLS.
For experiencing unique and stress-free work and rule the Market in WEB DESIGNING
I love to know what are your thoughts. Are you using this or this will be your first time knowing about HOVERIFY……LET ME KNOW IN THE COMMENT BOX.
Check my other article related to Digital Marketing tools of various categories
Click Here for Digital Analytics tools for Digital marketing
Want to know about the best YouTube Marketing tools? then CLICK HERE
To know How to use SEMrush all in one tool?
To know which one to choose between Google analytics & Mixpanel
Magical tool of great Youtubers
Knowing about Link building strategies is Mandatory to reign in this Digital marketing world
If are you a BEGINNER then this BEGINNER’S LIBRARY is exclusively for you.